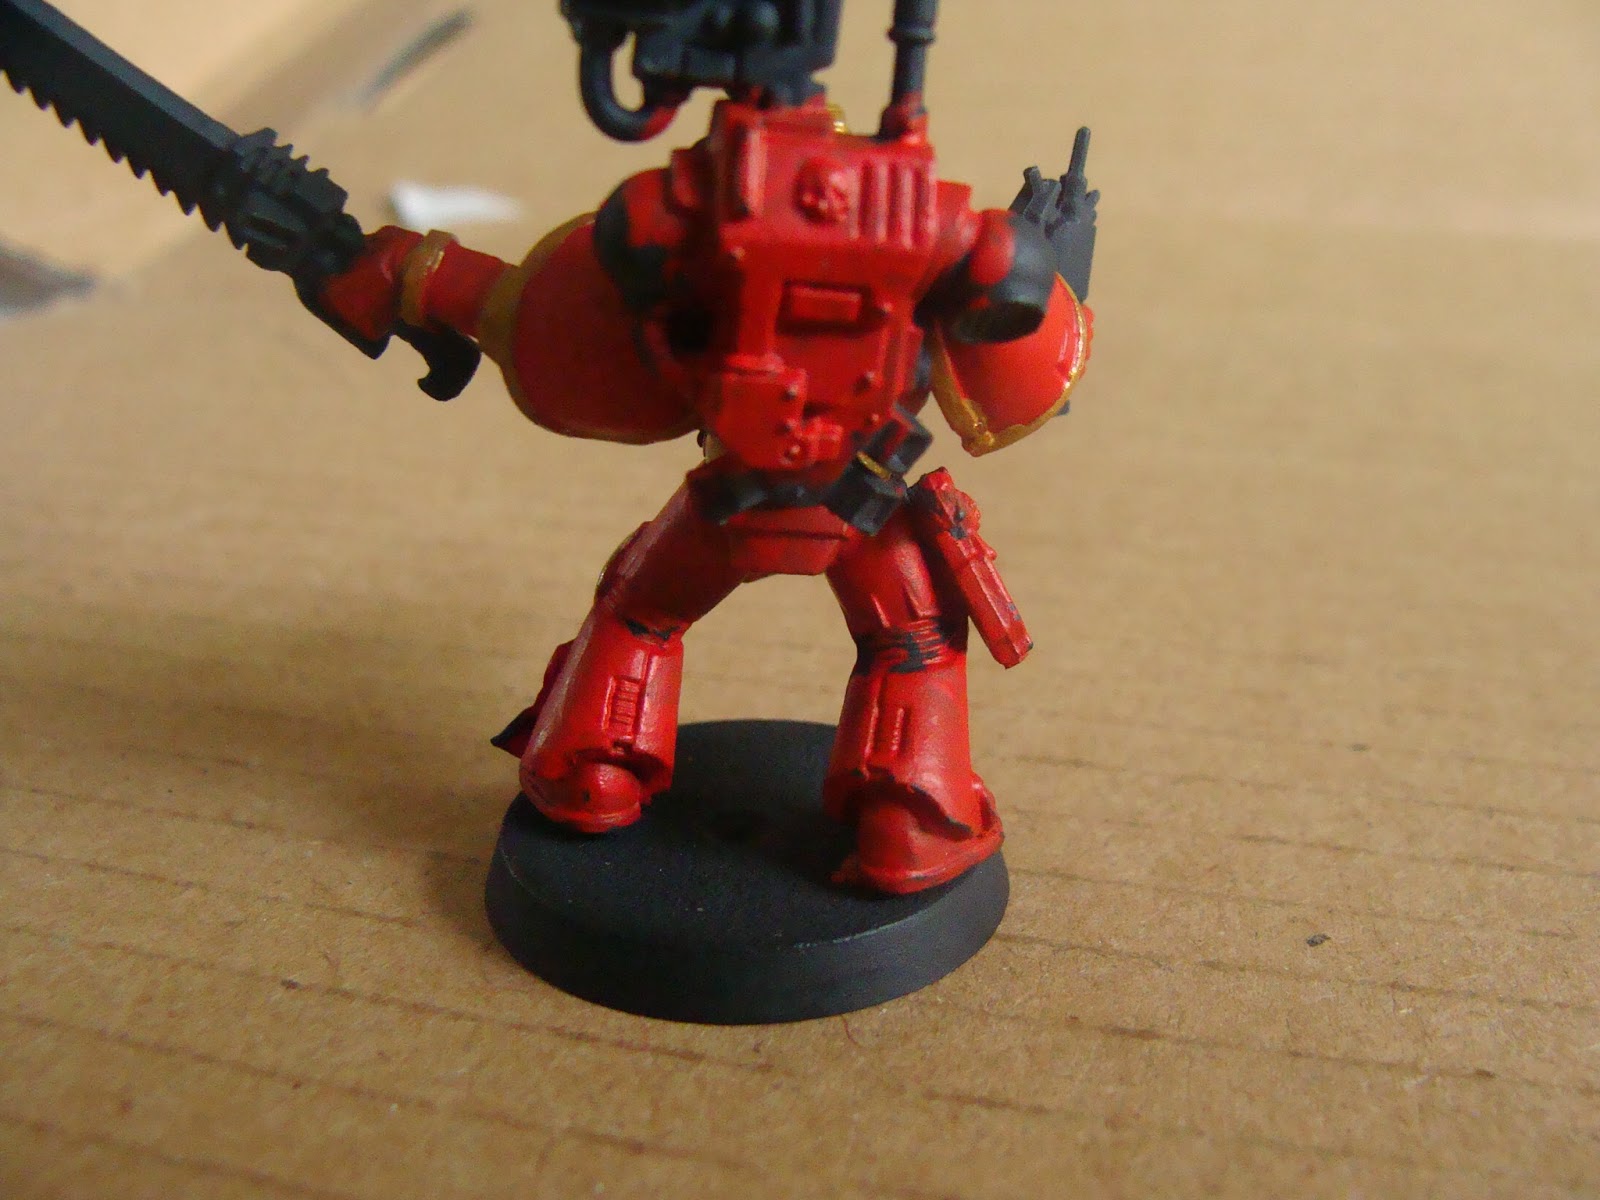
Step 1, Priming - I used a black spray paint over the
entire model. I use a flat black as a base coat on my entire army. I want my
army to have a dirtier, war-torn look. I don't want them to look spiffy and
brand new and not battle tested, like a brand new space marine straight out of
space marine boot camp. While a big portion of that look is achieved by
applying a wash later, it starts with the black base coat.
Step 2, Painting the Majority Color - I used a
citadel paints layer. The color is "evil sunz scarlett". The reason I
use a layer is so it doesn't completely cover up the black base coat, allowing
some of the black to show through and give it that dirty look I am going for.


I apply the paint
pretty generously, giving two to three layers until I have the right amount of
base coat showing through. At this stage, I don't worry about splashing paint
onto other parts of the model, as I will be covering those parts up with a
different color later.

While I am using my
red, I go ahead and paint his eye and breather. The helmet will end up being a
gold metallic, but I get the low points now so it makes detailing easier later.
Step 3, The Helmet - The helmet of my units is
something I like to diversify a little bit. My leaders normally have a 'custom'
helmet, while my rank and file soldiers have the usual red helmet. For my
devastator squad, I decided on going with a silver helmet and silver trim
instead of black trim, since they are an elite squad (and have performed VERY
well in play testing). For my leader, I decided to go with gold instead of
silver to set him apart from the rest of the squad.
Using a metallic
acrylic gold in the FolkArt line, and a detailing brush, I apply a layer of
paint over the entire helmet, outlining the eye and breather. Because this
brand of paint is thinner, it takes several layers to cover it properly. Also,
it doesn't dry as quickly as citadel paints, so this step takes a while between
layers.

I splashed a little
gold into the eye socket on my second layer. So I had to go back with the
detail brush and a drop of red to fix it. And since it was a recessed spot, I
had to go back over the outline with gold.
I used a citadel
color, "abaddon black", for the antenna and hoses on the helmet. This
color is a base, so it covered up any splashes easily.
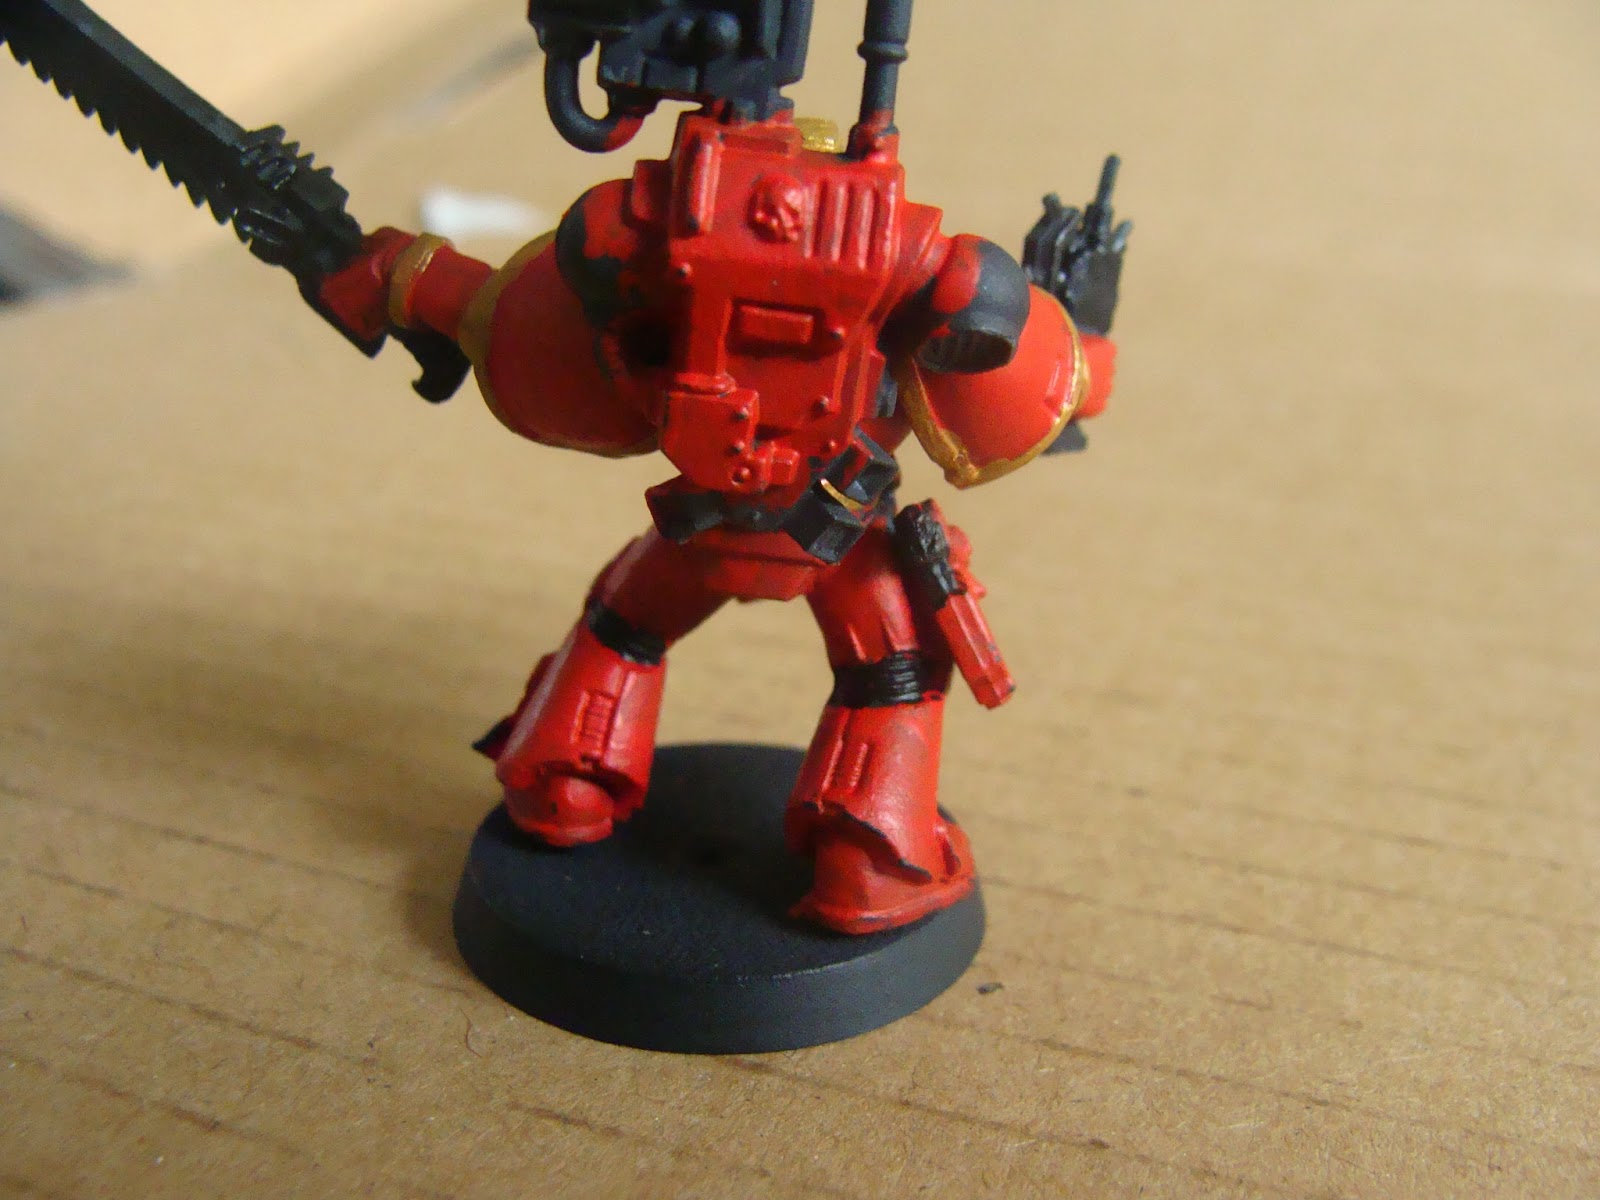
Step 4, Trim - Using the same color as the helmet, I
outlined all the areas that would normally be trimmed in black, like the
outline of the shoulder pads, elbow pads, etc. This part takes a while due to
the constant back and forth of colors. Anytime, I make a minor mistake, I have
to switch colors to correct it.

Normally, I don't
color the knee pads, but to break up the monotony I decided to paint them the
same gold color.
It was at this
point that I realized why I thought the gold and the red looked so good
together, and why it looked like something was missing when the knees were
still red. Look at the picture. Look closer. Got it yet? If not, look again.
... ... ... IRONMAN!!!!!

At this point I'm
hoping that the coloring of some of the details, especially with the purple and
white coming up that it will no longer look like Ironman when it's finished.
Part of me wants to continue with the similarities for fun, but I need to keep
in with the theme of my army. (Who am I kidding?! I am eventually going to have
a darth vader model be my commander!) So I decided to keep going with my normal
paint scheme instead of going crazy with it.
Step 5, Joints, Hoses, and other things that need to be
black - This step is all about putting black paint into recessed areas,
like the back of the legs, under arms, and then re-blacking any parts that got
splashes on them. Normally this goes in with the trim, since I usually trim in
black. But since I did gold for trim, I obviously had to split the steps.
(Can't paint two colors at one time.) Once the black is in the recesses, I take
red and outline the splashes to keep the black contained. This also serves to
give another layer and add some depth to the red.

I also went back in
this step and colored the belt buckle gold, as I failed to hit it last step.
Step 6, Weapons - Unlike the armor, which shows signs
of wear, I like the weapons to maintain a crisp appearance. Any soldier worth
his salt is always cleaning his weapons, keeping them in tip top shape for
battle. I black them nice and crisp, and then add some little details, such as
silver blades for the chainsword using citadel paints "ironbreaker".
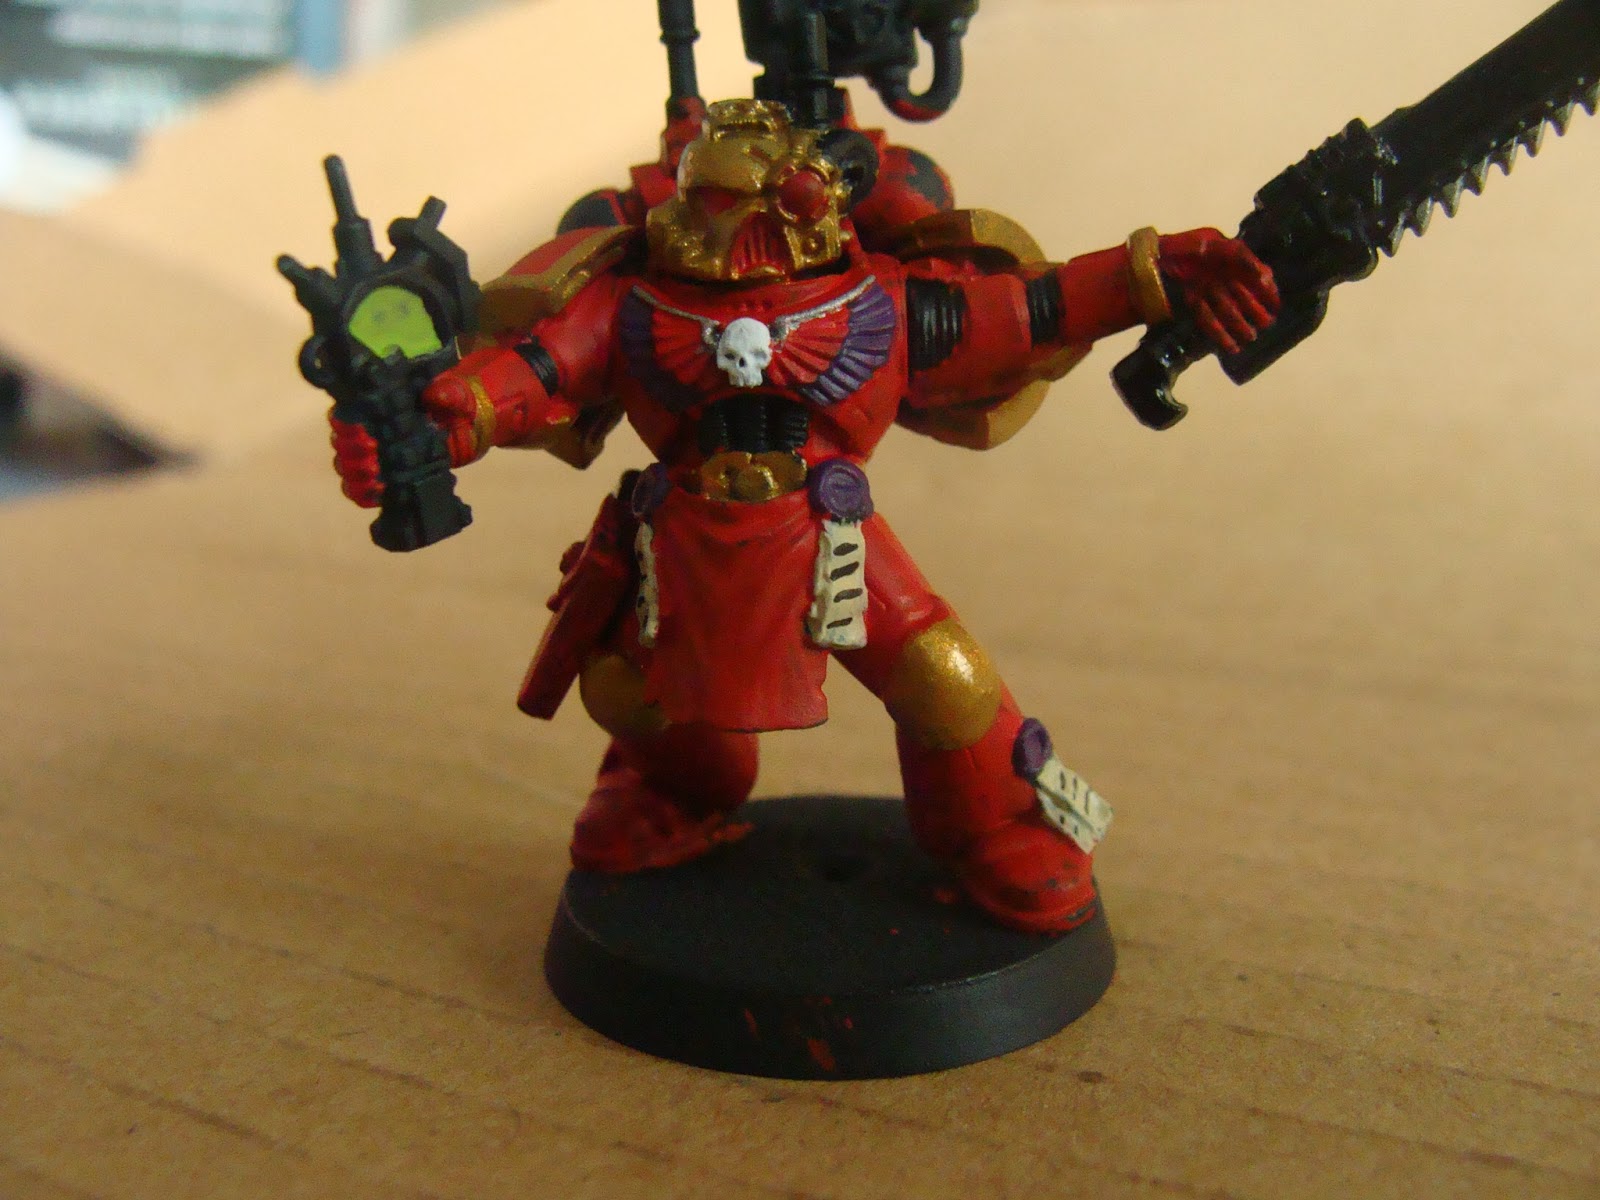
I also decided to
paint a screen on the signum, adding just another little touch of realism. I
used a paint that I don't know, as it was given to me by someone else. It's
kind of a diminished neon green. I wanted to mimic the green screens of some of
the old military equipment of the US Army.
I then decided to
use a black metallic acrylic from FolkArt on the chainsword and bolt pistol,
just to add some more snap.


Step 7, Chest emblem - I paint the imperium emblem
with a white skull, (Citadel "ceramic white"), silver outline, and
layered wings of red and purple (Citadel "xereus purple"). Always
start with the most recessed areas first, or you'll have to go back and do them
anyway. While I have my purple out, I go ahead and use the purple on the wax
seals of the marks of honor. Then I'll use Citadel's "screaming
skull" to give the marks a parchment look, and then finish up with small
lines of black so mimic writing.
Step 8, The Backpack - I use a similar pattern on the
backpack that I use for the emblem. It's pretty straight forward, start with
the recesses again, and then work your way out.

Step 9, Rangefinder - I decided that the rangefinder
on top of the backpack should be treated like a weapon. So I put some black
metallic on it, and then touched up the antenna, and put some minor details on
the rangefinder.

Step 10, Banner - Here's where things get bad for me.
I can't freehand that well. I put a silver border around the banner, and made
the frame it was hanging on red. I then tried freehanding a skull on it, but it
sucked. So I put red "D" on it for the devastator squad overlaid with an "A" for Alpha Company. I painted
the emblem on top like the chest emblem. In this step, I added an
"AD" on his left shoulder, for "Alpha Company, Devastator",
and an E7 rank on his right shoulder.


Step 11, Dirtying it up - For the last step, we take
Citadel "dryad bark" brown, and water it down quite a bit. Then we
paint several layers over the whole model, allowing it to dry in between
layers. This gives the whole model a dirty, war-torn look. It also highlights the low areas, bringing in some shading. Watering down the paint allows it to wash off of the raised areas, and collect in the low areas, meaning they'll be darker; just like how in real life dirt will collect in cracks more than all over.


So there you have it. The whole process took me about four
hours. I'm getting better at painting. Not at good as I'd like to be, but way
better than where I was. My goal is to eventually be able to paint and get paid
for it. Long way off, I know, but I'm getting there.
- Sapper Woody
Loads of folks want to be able to paint and get paid for it. They're called starving artists.
ReplyDeleteBut on a serious note, I'm impressed. The amount of painstaking attention to detail is astounding. The effect must be truly impressive when the whole squad is assembled.